Creating frames
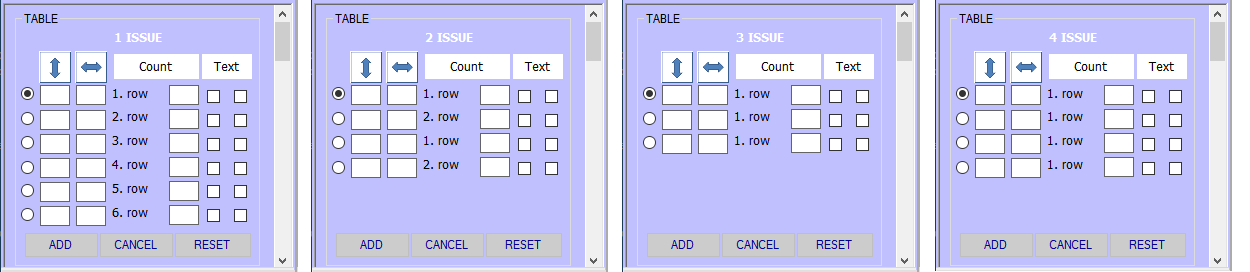
You will find a TABLE at the bottom of the left panel to create individual rows of stamp frames and descriptions.
Before you start filling in the data, you should already choose from the previous groups:
There can be only the same size stamps in each row. If a series contains stamps of different sizes, spread them out across multiple rows.
Start filling out data in the first row.
In the first column ![]() you can enter a vertical detachment.
you can enter a vertical detachment.
Enter the horizontal spacing ![]() in the second column. This creates the necessary space between frames.
in the second column. This creates the necessary space between frames.
You should repeat this in other rows to maintain a consistent look.
Data values will be in pixels.
If you leave this information blank, the program will use built-in data that uses the minimum values so you can place as many stamps on one page as possible.
In the following column, you will fill in the number of stamps to be in this row.
The last two columns add more text.
If you select the left cell, the text appears above the row of frames.
Select the right cell to add text below the row of frames.
After filling in the data in the first row, click ![]() .
.
A row of stamps will appear on the created page.
If you are not satisfied with the result, click ![]() .
.
The marked row will be deleted and you can make corrections.
If you have already created the first row, select the next row and continue in the same order.